How to Create a Cron Job
In this section, you will learn how to use Cron Jobs feature. Cron jobs allow you to automate certain commands or scripts on your site. You can set a command or script to run at a specific time every day, week, etc. For example, you could set a Cron job to delete temporary files every week to free up disk space.
Access your cPanel using your login credentials. Afterward, you will need to find the Cron Jobs feature, which is located under Advanced section.

Step 1. Adding Cron Email
- Cron Email feature sends an email with the output of your command, if any, every time the Cron job runs.
You can have Cron send an email every time it runs a command which produces output. If you do not want an email to be sent for an individual cron job you can redirect the command’s output to /dev/null like this:mycommand >/dev/null 2>&1. - If You want to use this feature, simply input your email address in the Email field and click Update Email button below.

Step 2. Adding a new Cron job
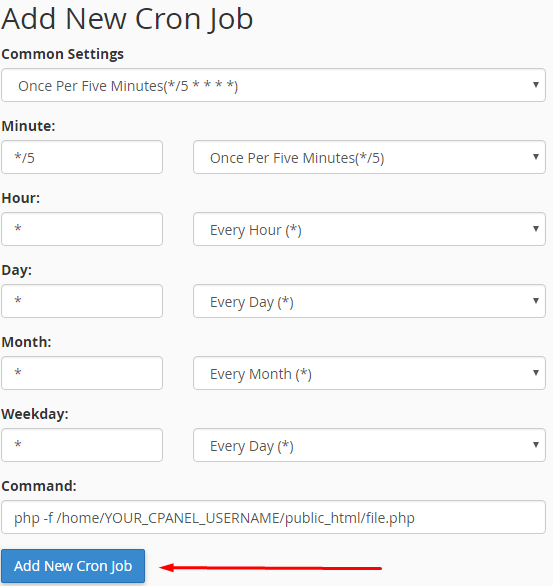
To add a new Cron job, it is required to fill out the following fields:
- Common Settings. This dropdown menu allows you to select a predefined setting for your command, you can either use this feature to set up the time for you or you can use custom time values in the fields below.
- Minute. This field is used to specify the minute value when your command will run.
- Hour. This field is used to specify the hour value when your command will run.
- Day. This field is used to specify the day value when your command will run.
- Month. This field is used to specify the month value when your command will run.
- Weekday. This field is used to specify the weekday value when your command will run.
- Command. In this field, you must enter the Linux command that will run at the times specified by the fields above.
For example, you can use this command to run a PHP script located in your public_html directory at the specified times:php -f /home/YOUR_CPANEL_USERNAME/public_html/file.php
IMPORTANT! You must insert your actual cPanel username instead ofYOUR_CPANEL_USERNAME.

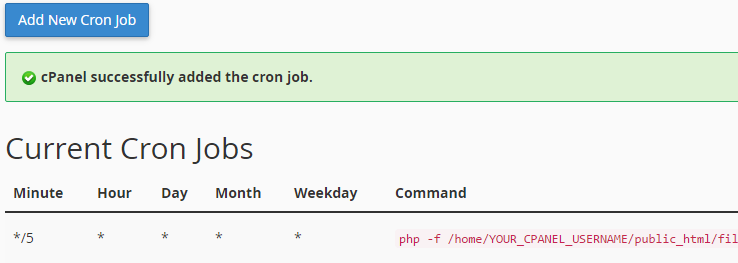
Click Add New Cron Job button. After clicking the button You will see cPanel successfully added the cron job. message, this means that the Cron job was added successfully.

Step 3. Removing and editing existing Cron jobs
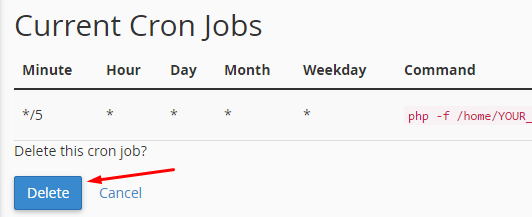
To remove your current Cron job, perform the following steps:

- Click the Delete icon next to the Cron job that you want to remove.

- Click Delete button.
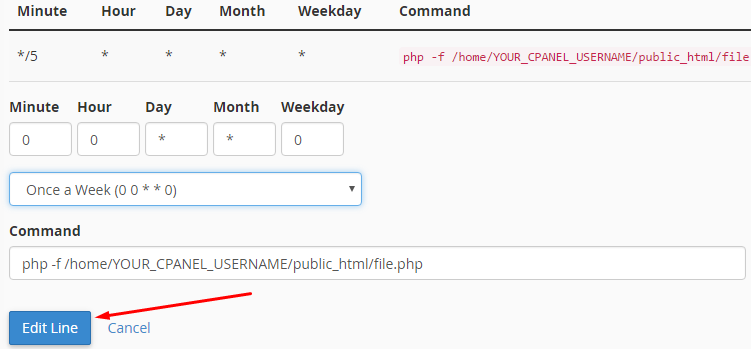
To edit your current Cron job, perform the following steps:

- Click the Edit icon next to the Cron job that you want to edit.

- Update Your settings with new settings and click the Edit Line button.
After following this cPanel guide you will be able to add, remove and edit Cron jobs to automate commands or scripts on your website.


